Monday, April 28, 2014

Can this sampler be saved?


This family sampler of my Mom's (step mom) was framed under glass, and subjected to a humid climate in storage limbo while my parents moved and built their dream house a few years ago.  The maker, older relative was long passed and I had never met her.

When I found it in the storage building, I really thought it was beyond saving.  Mom told me to just discard it.  That made me want to try and save it, for her sake.

I decided that it was a lost cause, which made me want to try and save it.  I decided that I couldn't make it any worse...


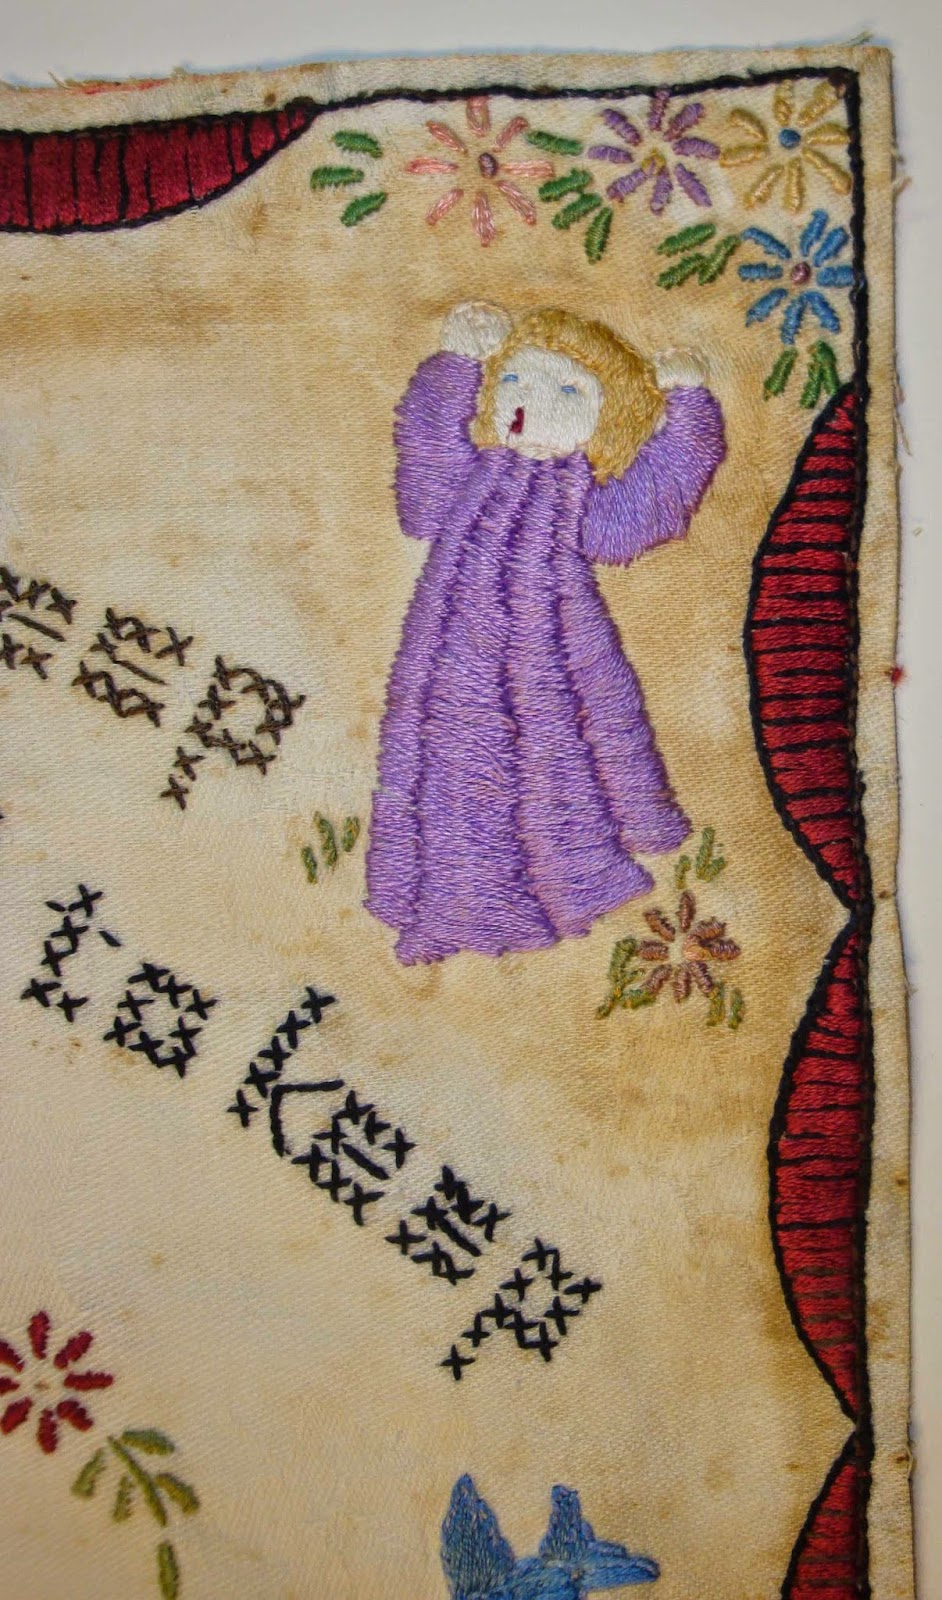
It had spots of mildew and many yellow areas, I suspect due to exposure to lignin, a chemical in paper from wood pulp (the same stuff that turns newspaper clippings brown).  It was mounted years and years ago on a cardboard mount, long before people realized that textiles should only be exposed to acid-free paper.


It was worked on linen and trimmed WAY to close for the framing.


See the residual paper/cardboard around the edges?  It was glued to the cardboard mounting.  What a freaking mess!


I had this little sample of Vintage Textile Soak I had picked up somewhere and thought I would give it a try...


I soaked it in tepid water with the dissolved wonder product.  I soaked it overnight...afraid to soak it any longer because I didn't want to damage the dye in the old embroidery thread.

The water was disgusting before I started rinsing out the  cleaning agent.


I soaked and rinsed until the water was crystal clear...you can see below that I wasn't quite "there" yet...


I gently squeezed out as much water as possible before rolling in a clean towel and squeezing further.

Using a pencil, I traced a rectangle of the right dimensions on a piece of foam board to use as a guide, then I stretched out the damp piece and pinned generously before allowing to air dry.

It's not perfect, and I think it looks cleaner than my poor photography demonstrates.  I will remove the pins and press it well before choosing some neutral fabric that closely matches to "make" a fabric mat for it using overlapping folded strips.  I will show that part later.

There is some very slight staining in places, but I choose to call that patina.  We'll see how it looks when the whole restoration is done.


In stitches,
Teresa  :o)

Friday, April 25, 2014

Quilt Show etiquettte...some "gentle" reminders...


I found a new blog this week...Pinkadot Quilts.  This cute little quilt was Kelly's contribution to her guild's 8" x 10" challenge.  

The Penn Oaks Quilt guild was challenged with making these little quilts to hang around their next show to gently, with humor, encourage people NOT to touch the quilts.  What a fabulous idea!

To check out Kelly's blog and see all the cute little "don't touch" challenge quilts, go here.    It is a "must see" link and blog.

What about these?


The above signs were seen at the Utah Quilt Fest in 2012 (Thank you, Christa...).

This is from the Roseville Quilters Guild Show of 2012...


A few from Pinterest...from Disney's "The Emperor's New Groove..."


Have a great Friday...I will be up to my elbows in spaghetti dinner fundraising!

In stitches,
Teresa   :o)

Wednesday, April 23, 2014

Removing the cat from the quilt...


Oh, right...he looks all cute and innocent NOW...he just looks at me, sweetly, as if to ask, "what 'cha do-in'?"

This is usually after he has rubbed up against or had a rolling stretch on EVERY SURFACE IN THE HOUSE...


Let's face it...cats love quilts.  Whether they are scattering scraps and blocks or trying desperately to snooze on something you are trying to work on, there is something about our craft that is like cat nip for our 4-footed furry friends.

It is time to answer the question of how many lint rollers does it take to remove the cat hair from a 96" x 96" quilt before a quilt show.


I am also doing a little spot spritzing as well to make sure everything is ship shape before driving the quilts to the first show of the season (Sauder Village) on Sunday afternoon.


I'm glad I put the quilt under this kind of scrutiny...I found a place I had not quilted!  Unbelievable!  I need to stop sleep-quilting...


I had not outline quilted around all the flowers and leaves in front of the fountain of the cello block.  Yikes!

I am famous for this...there's a wall quilt hanging in my house right now that I walk past every day and mutter to myself, "I've got to quilt that stupid 2-inch spot..."  


Anyway...look what I picked up on the lint roller...


All ready for the show...now I just need to put the quilts somewhere Weasley won't find them until the "Pastapalooza" fundraiser is over and I am happily driving to NW Ohio to drop them off for the show...maybe the roof of the house?!

In stitches,
Teresa  :o)

Monday, April 21, 2014

In under the wire...SO typical...


"Songs of Spring," 6-inch blocks by Lori Smith, outer border by me, is hand quilted and bound...just in the nick of time to be my second entry for the Sauder Village Quilt Show next week (Tuesday through Sunday) in Archbold, Ohio, along with "Baltimore Rhapsody" - the big music monster.

This tiny baby measures about 36" x 42".

I just love appliquing these fun, tiny blocks...the blocks are the perfect size for a baggie, take-along project...once they are glue prepped for applique.

I drive the quilts to drop them off on Sunday afternoon...yippee! Best not to peak too soon! 


The hand quilting is pretty boring...outline quilting of block motifs, diagonal grid through the blocks, piano key motif above the swags, and dense echo quilting in the outer border.

Since I am coordinating a huge fundraiser "Pastapalooza" spaghetti dinner for my daughter's high school music program this Friday night, I needed hand quilting therapy last week and weekend.  Hand quilting calms me down when I am contemplating a hanging death by hot, al dente pasta noodles...

I just love that stop border green wiggly striped fabric.  It gives the quilt a little motion.


Here are the twelve little blocks.  They are such a cute, little size...


Here I am, nervously soaking out the blue quilting lines and the glue from the corner outer border motifs.  I pre-shrunk my cotton batting before basting the layers together so that I could keep the overall shrinking of the finished quilt to a minimum.

Would you believe this is the first time I basically washed a quilt right after finishing it...not even waiting for it to get soiled?  I'm thrilled it didn't come apart or get all bunchy...

I don't know what I was afraid of...the small size made it an easy chore.


In stitches,
Teresa Rawson   :o)

Thursday, April 17, 2014

New and improved design wall...WAY overdue...


Well, the second college tour trip of the year is over...another 2000 miles on the car and the future still uncertain.  It is a good thing Riley is a junior...we have about 6 months before the application deadlines start emerging.

I finally got fed up with my old design wall.  Before our college trip, I picked the windiest day of the week and took off to Lowe's to buy two 4' x 8' sheets of insulating foam board.  

The price?  $12.50 a sheet.  The stupid, wacky drive home with a virtual kite/sail poorly strapped to to top of my Subaru Forester? PRICELESS!  

I'm surprised I wasn't pulled over and arrested for stupidity, really.

It's a good thing my car has a sunroof...toward the end I had my arm through the roof, holding onto the front edge of the foam sheets.  It was a little nuts trying to change gears (of course having a 5-speed manual transmission made this all even more absurd...).


I used my 50% off one cut coupon at Joann's to buy some wide oatmeal-colored felt.  Then I used my Mod Podge and a wide craft brush to "paint" the back edge of each foam board.  I stretched the felt to the backside and stuck pins in to hold things until the glue dried.  Voila!

I had to use my electric foam craft cutter to melt/slice one of the pieces that was too wide before gluing.  I also had to make a little cut for the bottom corner of the steps...I wanted the area as wide as possible.

Here is the first, slender panel in place over the poured basement wall.  I just used a level to make sure it was plum and tacked it into place.  Then I prepared the second, full sheet and got it into place right up against the first piece.  


There is a seam between the two covered panels, but I don't care. It is such an improvement over the (formerly) hot pink thermal blanket from college, received 35 years ago before entering Auburn University in the fall of 1978.


This is what my design wall USED to look like...a very tacky color peeking through my projects in progress.  I'm not even a pink person...I think the thermal blanket was a gift from someone for high school graduation.


I like the foam board and the ability to just poke pins in the thing, just like a bulletin board.

The beauty of having so many projects in progress makes it possible to hop, skip and jump around when momentarily stumped by the design progress. 

I am slightly stumped by the outer borders of the "Belles and Blossoms" project, so I designed an outer border for Lori Smith's "Songs of Spring"  6-inch blocks I had finished hand appliqueing.  I have the finished wall hanging basted and, now, mostly hand quilted.  I will show it soon!


Guess what we got on tax day...MORE SNOW!  My poor, late, shivering daffodils, who finally had the courage to stick their heads up last week...


Even though it was below freezing, the roads, driveways and sidewalks retained enough warmth to melt the snow.  Good riddance, polar vortex and the long hard winter of 2013-14!  The snow shovels were already up in the attic!


Wacky, wacky, but I did hear that the 2 inches or so was enough to push Detroit and our area into the record books for the snowiest winter ever recorded.  Then, Wednesday night the low temp of 16 degrees set a new record as well.


I shouldn't complain...other places in the Midwest received a lot more snow than that this week.  Weasley took the snow as a sign that his winter hibernation should be extended a little longer...


I hope you are getting some spring where you are (or maybe some fall colors "down under").

In stitches,
Teresa   :o)